Wednesday, May 16, 2012

Leeb's Awesome Hair!

We're very excited to be donating some Tick:Tock Cosmetics products for the silent auction this weekend! It is for the Elements Salon and Spa Hair Show this Sunday! The proceeds of the show go to the Terre Haute Humane Society, and being a vegan company, you know we love our puppies and kitties!

In our donation, we have full sizes of both Infinity Eye Shadow Base colors (Milky Way and Black Hole), and several full size eye shadows, Brit's First Time, Once Upon A Time, Atomic Clock, Frozen in Time, Midlife Crisis, Everyday Pink, Metronome, Time Square, and Digital. It's all approximately a $60 value!

Elements Salon and Spa is an absolutely amazing salon, and Tick:Tock has actually had the honor of getting to work with one of the stylists who works there, Danna! She is the stylist who did everyone's hair for the Terre Haute Living Magazine cover we did last year! She is actually the stylist who chose our Vice-President to be one of her hair models for the show this weekend! :-D Which is why, in case you haven't seen it, Leeb's hair is especially epic at the moment. She normally has pink hair, but she has a new asymetrical cut and some fun purple highlights to the pink that give it an awesome flair that is so Leeb! <3

I actually went with Leeb when she got her hair done at Elements! Here are some photos I took while we were there!

First--The cut! So cute!

The cut fromt he other side

Making it more pink and adding the purple in the foils! I have to say, Leeb could probably rock a hawk if she wanted.

Being sassy lol

From the back (Danna in the background!)

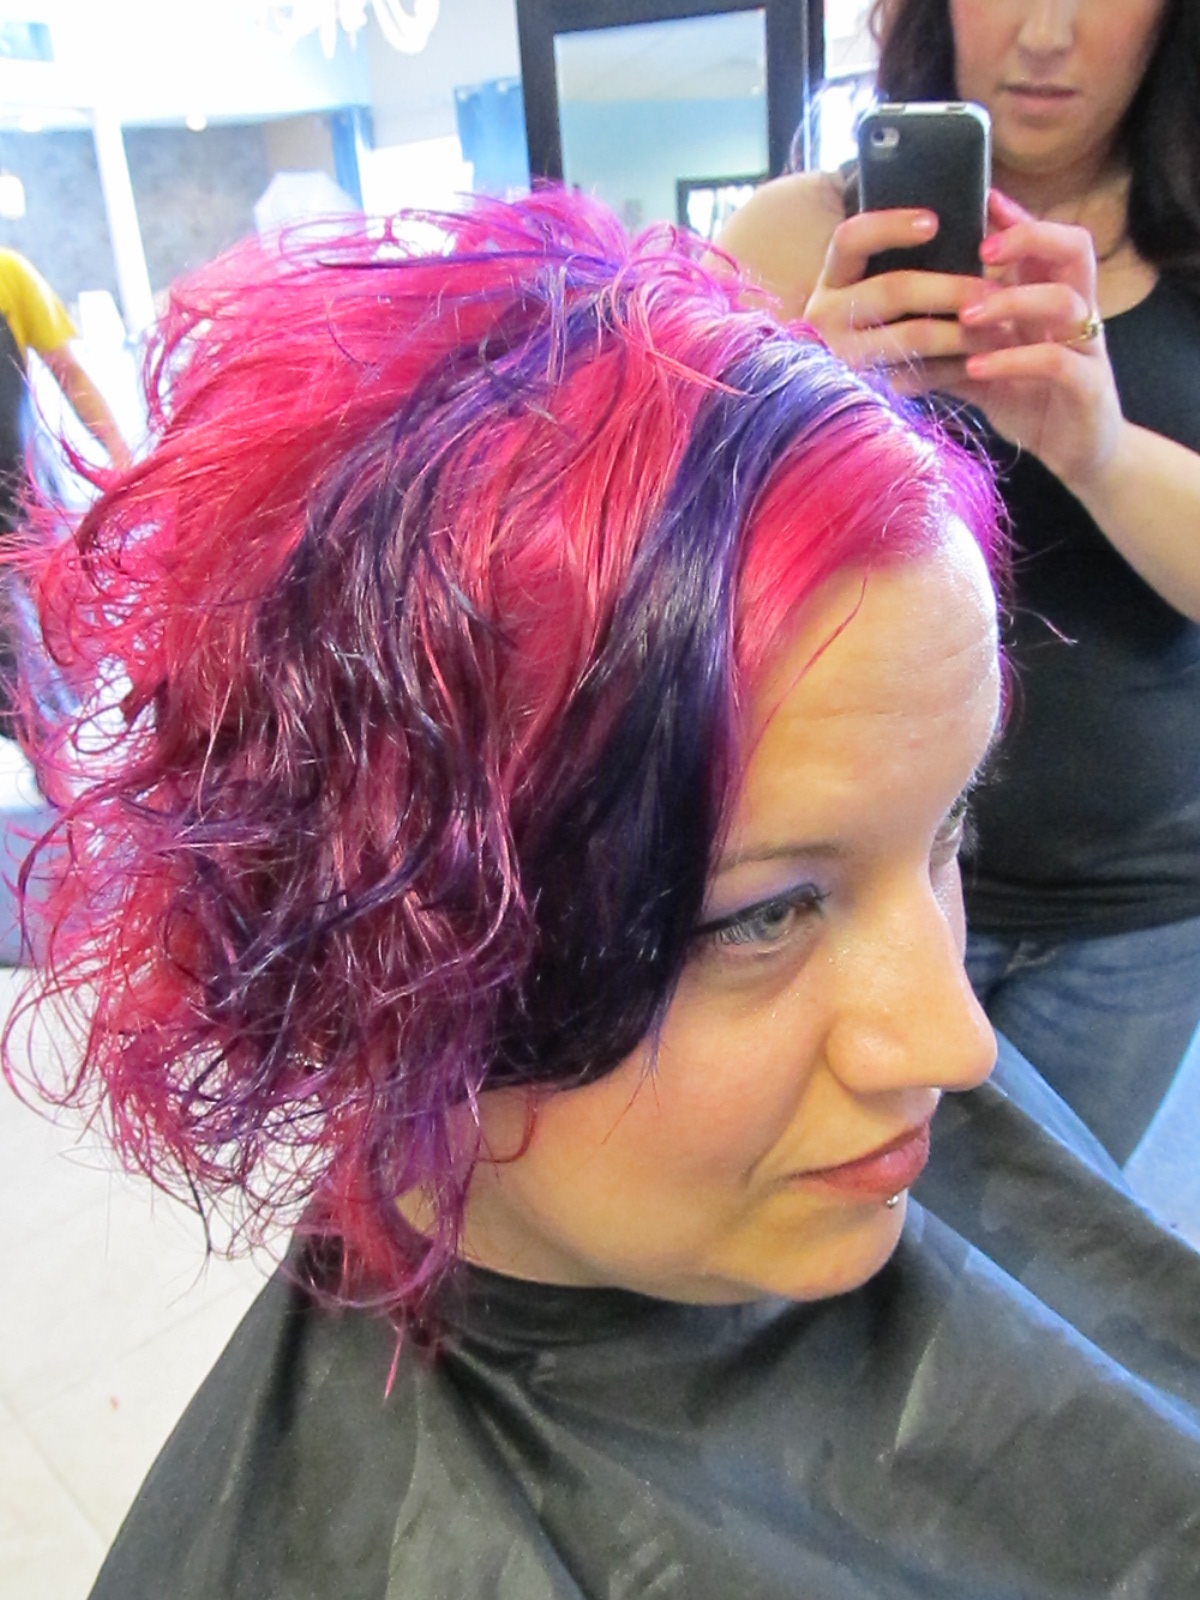
And from the side...


It's really just full of so much win. I'm jealous. Lol.

I know that I am very much looking forward to going to the show this Sunday to promote Tick:Tock and watch Leeb rock the runway, but also to raise money for a great cause! It's a win-win, really! Plus, I get to see everyone's awesome hair! <3 I'm so excited!

Thanks for reading and have a great weekend! Hope you enjoyed the post!

Hugs,
Tiffany

Tuesday, May 1, 2012

Just for Fun! Photo Tutorial for a Sunset Smoky Eye Look!

Hello Everyone! I decided that I would post a my first ever photo tutorial, and this is what I ended up doing! I've got a Reader's Theatre performance this evening, so I couldn't do anything too "crazy," but I have to say that this is a look that could be considered an out of the ordinary smokey eye!

1. Start with a nice, nakey face and eye lid. :-)

Step 1
2. Apply Infinity Eye Shadow Base in Milky Way to entire eye lid using either your finger or a concealer brush. I use a concealer brush first to get lots of product on, then blend lightly along, making sure to blend the edges.


Step 2
3. Apply Pocket Watch* on the inner part of the lid and stop at about the center of the eye lid. 

Step 3
*This is the NEW Pocket Watch Formula. The old formula has more of a yellowy tone to it, which this is much more golden and light. 

4. Add some Two-Timing to the outer area of the lid. Depending on your eye shape, you can carry this down to the lid area, but I tend to keep the color inside and just above the crease line. This is going to give our look it's sunset tone. :-) Also, don't worry about being messy at this point, anything you do can be fixed in the blending process.

Step 4

5. Apply Hourglass to the center part of the eye lid and blend into Pocket Watch and Two-Timing.

Step 5
6. For this part, I used Raspberry Tea in the crease and blended into Two-Timing. However, if you don't have Raspberry Tea, have no fear! You can easily use Midsummer Night, Grandfather Clock or even Digital for a more dramatic look to get basically the same effect. We're just adding more depth to the crease.

Step 6

7.  Next, use Metronome as a highlight on the brow bone and blend, then finish with eye liner and mascara! I also used a little bit of Raspberry Tea over my bottom liner! I applied Clinique's Quickliner for Eyes in Really Black to the bottom water line and lash line and used Clinique's High Definition Mascara in Black for this look!

Step 7
8. Finish it all off with your favorite foundation and set with a finishing powder! I used Clinique's Redness Solutions Foundation in Calming Alabaster and Face-Time Finishing Powder!

Here's the finished look all together!

Step 8
And that's it! I hope you like this tutorial! I had fun doing it, and I hope that I can do some more soon! Comment below with anything you'd like to see for our next tutorial! <3